For two decades, IPCs have streamlined low-voltage and secondary connections, eliminating the time sink of traditional split bolts, taping, and weatherproofing. They are faster, they are inherently safer, and they offer superior environmental sealing—but only if you execute the installation perfectly.
This isn't theory. This is the field execution manual.
Why Use Insulation Piercing Connectors (The Veteran’s View)
We are skipping the physics. You are using IPCs because they drastically cut labor time on hot lines and provide a factory-sealed connection that laughs at moisture ingress. The IPC is designed to perform one critical function: establish a stable, low-resistance electrical pathway by simultaneously displacing the conductor’s insulation and gripping the energized metal.
This process is highly efficient. It is also unforgiving. The success of any IPC installation rests entirely on precise torque application and correct component alignment.
Pre-Installation Checklist: Getting it Right the First Time
Before the tooling hits the hardware, mandatory checks are non-negotiable. Poor preparation costs exponentially more time than careful planning.
- Sizing Verification: Match the connector range exactly to the conductor gauge. Oversizing prevents proper piercing; undersizing damages the conductor strands. Reference the specific connector manufacturer’s documentation. This is mandatory.
- Tooling Readiness: Only use specialized tools designed for IPC installation—typically a standard socket wrench with an internal breakaway shear nut mechanism. Ensure the socket is clean and free of debris.
- Conductor Cleaning: While IPCs pierce insulation, they perform best when the outer surface is clean. Use a clean rag to wipe down the section of the energized line where the tap will occur, removing road grime, dust, and accumulated grit.
- PPE: Proper electrical gloves, sleeves, and eye protection. You are dealing with energized circuits. Respect the line.
Step-by-Step Installation Procedure
The procedure is simple, but precision matters. Follow the three steps precisely.
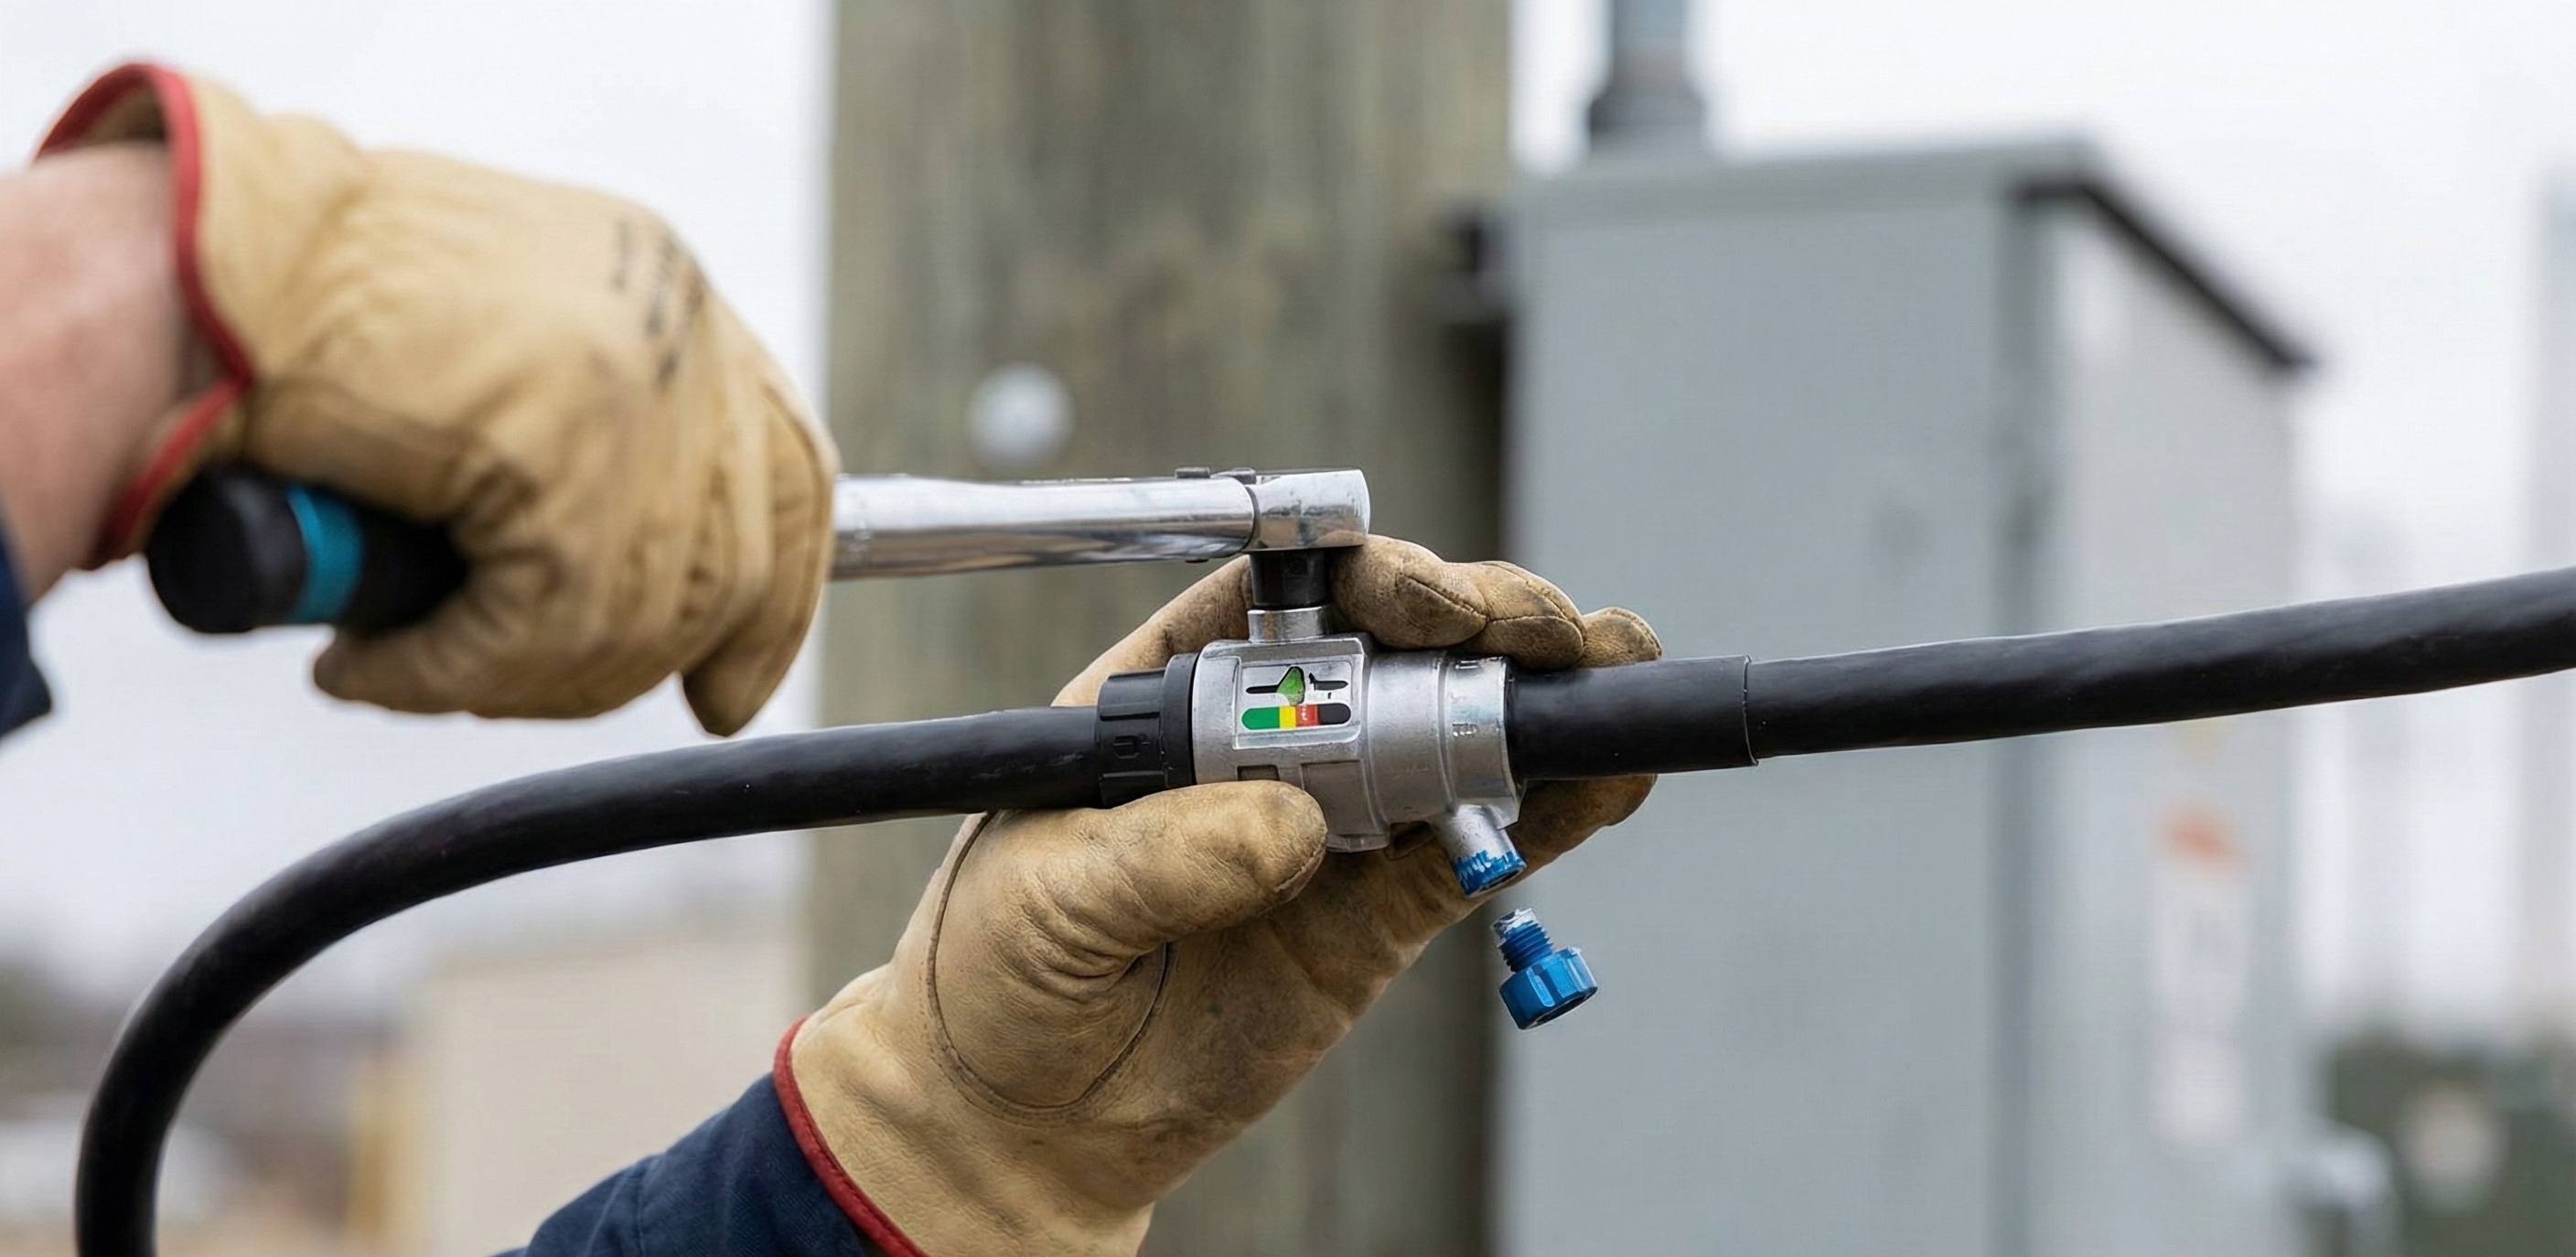
Step 1: Alignment and Seating
- Insert Conductors: Feed the run conductor into its channel and the tap conductor into its respective channel. The conductors must pass fully through the connector until they hit the internal stop or marker line. No partial insertion.
- Visual Check: Confirm the conductor insulation aligns perfectly with the piercing teeth location specified by the manufacturer.
- Pre-Tightening: Manually or lightly wrench the shear head nut until the piercing plates just begin to make firm contact with the insulation.
Step 2: Torque and Termination
This is the failure point for most amateur installations. We are not guessing; we are applying precise pressure until the shear head mechanism activates.
- Tool Engagement: Engage the socket wrench onto the shear head nut.
- Smooth Motion: Apply steady, continuous force. Do not use jerky or inconsistent movements.
- Listen for the Break: Continue applying torque until the head of the shear nut breaks completely away from the main body of the nut. This clean break confirms you have achieved the manufacturer’s required pressure.
- Stop Work: Once the head shears off, installation is complete. Remove the socket wrench.
Step 3: Verification and Sealing
- Visual Confirmation: Check the IPC body. Ensure there is no visible cracking or distortion outside of normal compression marks.
- Testing: Use appropriate test equipment (e.g., clamp meter) to verify voltage and current flow through the newly tapped line.
- Sealing (If Applicable): Most modern IPCs are designed with internal dielectric grease and tight sealing gaskets, rendering external taping unnecessary. However, always check local code.
Common Installation Errors (and How to Avoid Them)
| Error Type | Consequence | Prevention Strategy |
|---|---|---|
| Using Torque Wrenches | Torque wrenches measure rotational resistance, not clamping force. Leads to under-torque or over-torque. | Use connectors equipped with shear head nuts only. The shear mechanism is factory-calibrated. |
| Tool Slippage | Causes uneven penetration and potential damage to the shear head. | Ensure the socket is fully seated on the nut before applying force. Maintain steady alignment. |
| Insufficient Conductor Penetration | Piercing teeth may only engage a portion of the strands, creating a high-resistance spot. | Visually confirm conductor depth before applying torque. |
| Attempted Re-use | Structural integrity and moisture seal are compromised. | Never reuse an IPC. Cut it out and replace it with a new one. No exceptions. |
Installation success depends on adherence to specifications. The simplicity of the IPC is its greatest asset, provided you respect the torque requirements. Install correctly, install once. Get back to work.